Best Linux for kids (Starter)
Learn My Child Linux | We are writing our first script to automatically upgrade the operating system.
After familiarizing ourselves with the basic commands of the terminal in Linux, we can now use them to write a script file that will execute many of them together.
These types of programs are called “Bash scripts” and are nothing more than a “sheet of paper” with landing commands.
So we will create a file that will update our installed applications, whether they are traditionally installed, or consist of “snap” or “flatpack” packages.
It will also install all the pending security updates on the operating system, and in the end, will clean up the libraries that are no longer needed.
Finally, the script we are writing only works on Debian-based distributions, such as Ubuntu – Ubuntu for kids and Raspbian.
Create the “update” script
So we open our terminal and create the “update” file with the command:
| touch update
Then we use the “nano” word processor to open it inside the terminal:
| nano update
Note: We can directly use the “nano update” command, which will create and open the “update” file in our terminal.
Now we have to tell the system that this file is a “bash script” to know how to handle it. This is done by adding the following to the first line:
| #!/bin/bash
To upgrade to a Debian-based system we first need to “ask” our repositories if they have anything pending. This is done by the command:
| Sudo apt update
To install the available packages now, we add the command:
| Sudo apt upgrade -y
Note:
Note that at the end of the command we added the “-y” pointer. This is because “apt upgrade” will ask us to agree if we really want to proceed with the installation.
This will get the “yes” from which the “-y” comes in beforehand so the installation will not be interrupted.
Then we will remove all unnecessary libraries from our system as follows:
| sudo apt autoremove -y
So far we are finished with our applications that are traditionally installed. To upgrade our “snap” packages to our system, we add the command:
| sudo snap refresh
Finally we can also use applications that are packaged in “flatpack”. To add these to the upgrade script, we add the command:
| sudo flatpak update -y
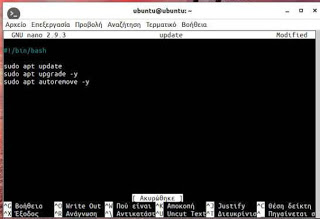
So our final archive should look something like this:
| #!/bin/bash
sudo apt update
sudo apt upgrade -y
sudo apt autoremove -y
sudo snap refresh
sudo flatpak update -y
Installing the script on our system
Our program is ready and is now waiting to be installed. So we need to put it in the “bin” folder where all the Debian core programs are located.
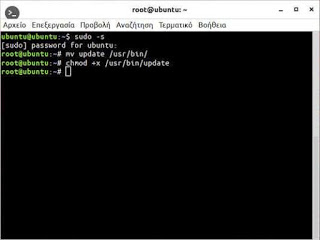
To get to the “bin” folder we must first have administrator privileges and this is done with the command:
| sudo -s
We transfer the “update” file to the “bin” folder:
| mv update /usr/bin/
Finally, we convert it into an executable file and we are ready to:
| chmod +x /usr/bin/update
How do we use it?
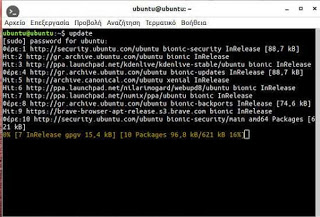
To run the program we just created, simply give the following command to the terminal, followed by our user code:
| update
In conclusion
The good Linux stands out from his scripts, which help him automate his daily tasks.
In addition to this simple system upgrade program, we can write corresponding “scripts” that will back up our files and folders to an external disk or install all the programs we need after factory data reset.
In one of the next articles in the series “Learn My Linux Child”, we will also see how we can get our scripts running at regular intervals with the help of Cron.
So we will create a truly automated system that will run on its own!
CheckOut: – HiSense E75F, the official new gaming TV: all the details and prices


